Saturday, February 23, 2013

Wooden Bracelets Set


Another Borawan/Dampalitan trip accesorry. 
Primary material is wood to capture that tropical feeling. 
Coated with colorless nail polish to protect the color of the wooden beads. 
I gave two of these to a cute little girl in the area.

Materials/Procedures:
1. Stretchable nylon cord
2. Needle
3. Colorless nail polish
4. Light colored wooden beads
5. Dark colored wooden beads
6a. Gather light beads and make single strand of it.
6b. Finish item.
7a. Gather together dark wooden beads and make another single strand.
7b. Finish item.
8a. Alternate placing lighter and dark beads in the cord.
8b. Finish item.
9a. Place dark bead after every three light beads. One or two more rounds of nylon to secure bracelet. 
9b. Finish item.
10. Coat with colorless nail polish. One side first, air dry and coat another side. 
11. Wear as a set. Enjoy!!

*** dReaM, CreAte, InsPire ***

*** Craftaholic Pinay ***

Tuesday, February 12, 2013

Green Zig Zag Necklace Goes to Dampalitan and Borawan Islands of Quezon Province


My green necklace matches perfectly the places I recently visited. Dampalitan Island with its pine trees planted shore and Borawan Island with plants and trees growing on the rocks.

I was able to wear the necklace the whole two days without causing inconvenience on my part. It seems I picked the right beads and materials this time. The round shape but flat surface green beads sits
perfectly in my chest, its not causing any friction at all. Happy with my creation. :)

Check the rest of my adventures at my personal/travel blog www.ladynyx14.blogspot.com
I will try to compose the article as soon as possible.

Summer is just couple of months away. What will be your summer accessory this year?

*** dReaM, CreAte, InsPire ***

*** Craftaholic Pinay ***

How to Tie an Adjustable Thread Knot as Lock for Necklaces and Bracelets


This is the lock of my green zig zag necklace. When I am using a necklace for swimming, I don't like any base metal findings in my accessories to avoid skin allergy specially near neck area. 
This adjustable thread knot could be use to bracelets, as well. 

Tutorial:
1. Work with thread facing you this way. You won't move the left thread. Only the right thread will be moving.
2. Move right thread under left thread.
3. Now, the same right thread must be above the left thread.
4. The right thread is now back to the right side. Place it under right thread.
5. Pull right thread to the middle. Place right thread above the same right thread, then under the same right thread at the bottom part nearest you.
6. Pull together to close. The left thread will be the part moving here coz you keep it straight all throughout the process. Try pulling the left part thread to loosen and tighten your necklaces and bracelets.

*** dReaM, CreAte, InsPire ***

*** Craftaholic Pinay ***

Zig Zag Necklace Design


This is the necklace I made (rushed) for my Dampalitan/Borawan Islands trip.
I knew we will be swimming in sea water and so I need one that is not made of metal. The Monaco crochet thread is perfect for this necklace. I want one I could wear all throughout my trip. 

Materials/Instructions:
1. Get beads with holes near at one side (not in the middle) to get this zig zag design.
2. Smaller beads. I choose cats eye coz it doesn't fade easily, its smooth and it won't be affected by sweat. 
3. Black Monaco crochet thread. 
4. Place cats eye beads on the thread.
5. Tie both ends.
6. Place your primary beads. Decide how long it will be. Mine was bigger coz I want to emphasize it when I wear it.
7. Tie to close.

*** dReaM, CreAte, InsPire ***

*** Craftaholic Pinay ***

Friday, February 8, 2013

Valentines Day Bracelets


One more week and its Valentines Day. Not sure if I will have a romantic Vday date this year but just in case, better ready my outfit which includes this beautiful, hand-made stretchable red bracelets. I made three bracelets from one string of beads and with just nylon and spacers, I was able to complete this set. 

So ladies, like me, wear your cutest dress, slip those red high heel stiletto shoes, swipe a vamp lipstick, grab a delicate pouch and wear this uber red bead bracelets. 

On a Valentine's day, with or without a romantic date, be at your best.

xoxo,

Lady Nyx of Craftaholic Pinay


*** dReaM, CreAte, InsPire ***

*** Craftaholic Pinay ***

Thursday, February 7, 2013

Red Beads Bracelet with Several Metal Spacers


Materials/Instructions:
1. Stretchable nylon cord
2. Metal spacer 
3. Red beads
4. Needle
5. Place cord in the needle
6. Alternately put beads and metal spacers.
7. Tie one end and another round of nylon for stability.
8. Finished design

*** dReaM, CreAte, InsPire ***

*** Craftaholic Pinay ***

Simple Red Beads Bracelet with Metal Spacers


Materials/Instructions:
1. Stretchable nylon cord
2. Metal spacer "flower design"
3. Red beads
4. Needle
5. Place cord in the needle
6. Place spacer
7. Alternately put beads and metal spacers.
8. Finished design

** dReaM, CreAte, InsPire ***

*** Craftaholic Pinay ***

Plain Red Beads Bracelet


Materials/Instructions:
1. Stretchable nylon cord
2. Beads
3. Needle
4. Attached nylon to needle
5. Place beads
6. Decide if beads are enough compare to your wrist size.
7. Tie one end.
8. To fully secure beads, have another round of nylon
9. Cut nylon.
10.Finished product perfect for Valentines Day.

*** dReaM, CreAte, InsPire ***

*** Craftaholic Pinay ***

Monday, January 28, 2013

Bead Bracelets Designs from my Online Buyer, Shayne


Woot woot!! Received an email today from my buyer and suprised to see that she actually attached 
a photos of her creations from the DIY kit she ordered from me.

Its been quite a while that I kept on receiving lots of inquiries and orders but she's the first one who
actually sent me images of her finished projects. And oh, we are still communicating and looking forward
for another transaction. 

I'm so proud of my buyers. They know they want to learn bead crafts, they know they are creative and 
they put effort in making their passion possible and that's how they find me; www.ladynyx14.sulit.com.ph

Seriously speaking, I never earned a lot from this business idea. Its just that when I am starting out, I knew 
how hard is it to find materials. When I became familiar with the places that cater them, I thought there
must be more like me who never knew where they could purchase these trinkets.

Some of my clients already visited the places and stores where I purchased my supply but still having issue of what to pick and buy; they goes back to me and order their first DIY kit. Some of them eventually learned to
outsource their supply, others specially those from the province stick with my service.

Some reported back and told me they already sold their first designs, some asked how much they gonna sell it. Others learned the name of the materials one by one.


Its such a joy to find out there are lots of creative people around. There are teens, yuppies, working professional, mothers, business minded women etc. Some orders are within Metro Manila, others came from Luzon, I received inquiries from Visayas, still waiting for orders from Mindanao and finally got an inquiry for 
shipment abroad, which is a delightful news coz I included in my ads that I am only accepting local buyers.
It makes me think I should reconsider accepting international orders. This week I am going to my 
trusted courier Mail n More in Tiendesitas, Pasig to get an idea how much an international shipment 
might cost. After that, I might consider editing my transaction policy. Besides, the main reason
why I posted such ads is to make it accessible to those people. I couldn't isolate my products within Philippines if other people around the world also wants them.It makes me wonder maybe 
it's the same reason why international company must launched sites and branches around the world, there
is a need that must be cater. I felt I found a market void to fill. 
This is the DIY kit she used to make the bracelets above, worth Php1,500.00 including shipment. 
More creative Pinoy and Pinay. More business transactions for me.
Everyday is a learning process and I am learning online business little by little.

Thank you to Shayne of Sorsogon City for the trust. I am proud of you, young woman.

Disclaimer:
Shayne's bracelet designs are posted with permission.


*** dReaM, CreAte, InsPire ***

*** Craftaholic Pinay ***

Sunday, January 13, 2013

Doll Dress Design: Light Pink Crochet Top with White Satin Skirt Beaded with Faux Pearls


** dReaM, CreAte, InsPire ***

*** Craftaholic Pinay ***

Doll Dress Design: DMC Cross Stitch Floss Thread Top with White Satin Skirt Accented with Green Beads


** dReaM, CreAte, InsPire ***

*** Craftaholic Pinay ***

Doll Dress Design: White Monaco Crochet Thread Top with White Satin Skirt Beaded with Faux Pearls


*** dReaM, CreAte, InsPire ***

*** Craftaholic Pinay ***

Doll Dress Design: Violet Monaco Crochet Thread Top with White Mesh Skirt


*** dReaM, CreAte, InsPire ***

*** Craftaholic Pinay ***

Doll Dress Design: Light Yellow Crochet Top with Yellow Satin Skirt


*** dReaM, CreAte, InsPire ***

*** Craftaholic Pinay ***

Doll Dress Design: Pink Monaco Crochet Thread Top with White Mesh Skirt


*** dReaM, CreAte, InsPire ***

*** Craftaholic Pinay ***

Monday, January 7, 2013

How To Make A Simple Bead Earrings


Tutorial:
1. Get fish hook ear wires.
2. Get regular head pins.
3. Get some spacer.
4. Get your beads.
5. Place beads in head pins.
6. Place spacer on top.
7. Cut excess metal wire while leaving extra wire to be bend.
8. Bend head pin.
9. Take fish hook ear wire.
10.Place fish hook ear wire and attach the bead.
11.Make the other pair. Place in paper earring holder and clear ziplock.
12.This is the actual size of the earrings compare with one peso coin.
13.Arrange them nicely. 

*** dReaM, CreAte, InsPire ***

*** Craftaholic Pinay ***

How To Make a Simple Bead Earring with Dangle Smaller Bead


Tutorial:
1. Get fish hook ear wires.
2. Get regular head pins.
3. Get round end head pins.
4. Get some spacer.
5. Get the primary beads.
6. Get some smaller beads.
7. Place beads in head pins. The smaller beads on regular head pins and big beads in round head pins.
8. Cut excess metal wire while leaving extra wire to be bend.
9. Place spacer on top of the big beads. Bend head pins but not fully close.
10.Attached the smaller bead part to the big bead part.
11.It should be like this at this stage.
12.Place fish hook ear wire and then close. Make the other pair.
13.Place in paper earring holder and clear ziplock. Arrange them nicely. 

** dReaM, CreAte, InsPire ***

*** Craftaholic Pinay ***

How To Make A Simple Bead Earrings


Tutorial:
1. Get fish hook ear wires.
2. Get head pins.
3. Get some spacer.
4. Get your beads.
5. Place beads in head pins.
6. Place spacer on top.
7. Cut excess metal wire while leaving extra wire to be bend.
8. Bend head pin.
9. Place fish hook ear wire and then close.
10.Make the other pair. Place in paper earring holder and clear ziplock.
11.Arrange them nicely. 

** dReaM, CreAte, InsPire ***

*** Craftaholic Pinay ***

How To Make a Single Bead Earrings


Tutorial:
1. Get fish hook ear wire.
1. Get head pins.
3. Get your beads.
4. Insert bead to head pin.
5. Cut excess metal wire while leaving extra wire to be bend.
6. Bend head pin.
7. Place fish hook ear wire and then close.
8. Make the other pair.
9. Place in paper earring holder and clear ziplock.
10.Arrange them nicely. 

** dReaM, CreAte, InsPire ***

*** Craftaholic Pinay ***

Basic Bead Earring Materials

When you are just starting to learn this craft, you don't need to have all those complicated items and materials. First, all you need is that eagerness to learn how to make these stuffs. Second, go to action and find a person or websites where you could learn the basic skills. And lastly, buy your materials one at a time. 

Bead Haven: Villalobos Street Quiapo

Villalobos Street in front of Quiapo Church main door

Quiapo is a special place for bead enthusiasts and accessory sellers. Confined within its narrow streets are treasures for people like me who takes bead craft seriously either as a hobby or as a business.

Tuesday, January 1, 2013

Happy New Year from Craftaholic Pinay


Happy New Year, everyone. 

** dReaM, CreAte, InsPire ***

*** Craftaholic Pinay ***

Saturday, December 29, 2012

Create an Art Work Using Your Cellphone Camera Effects


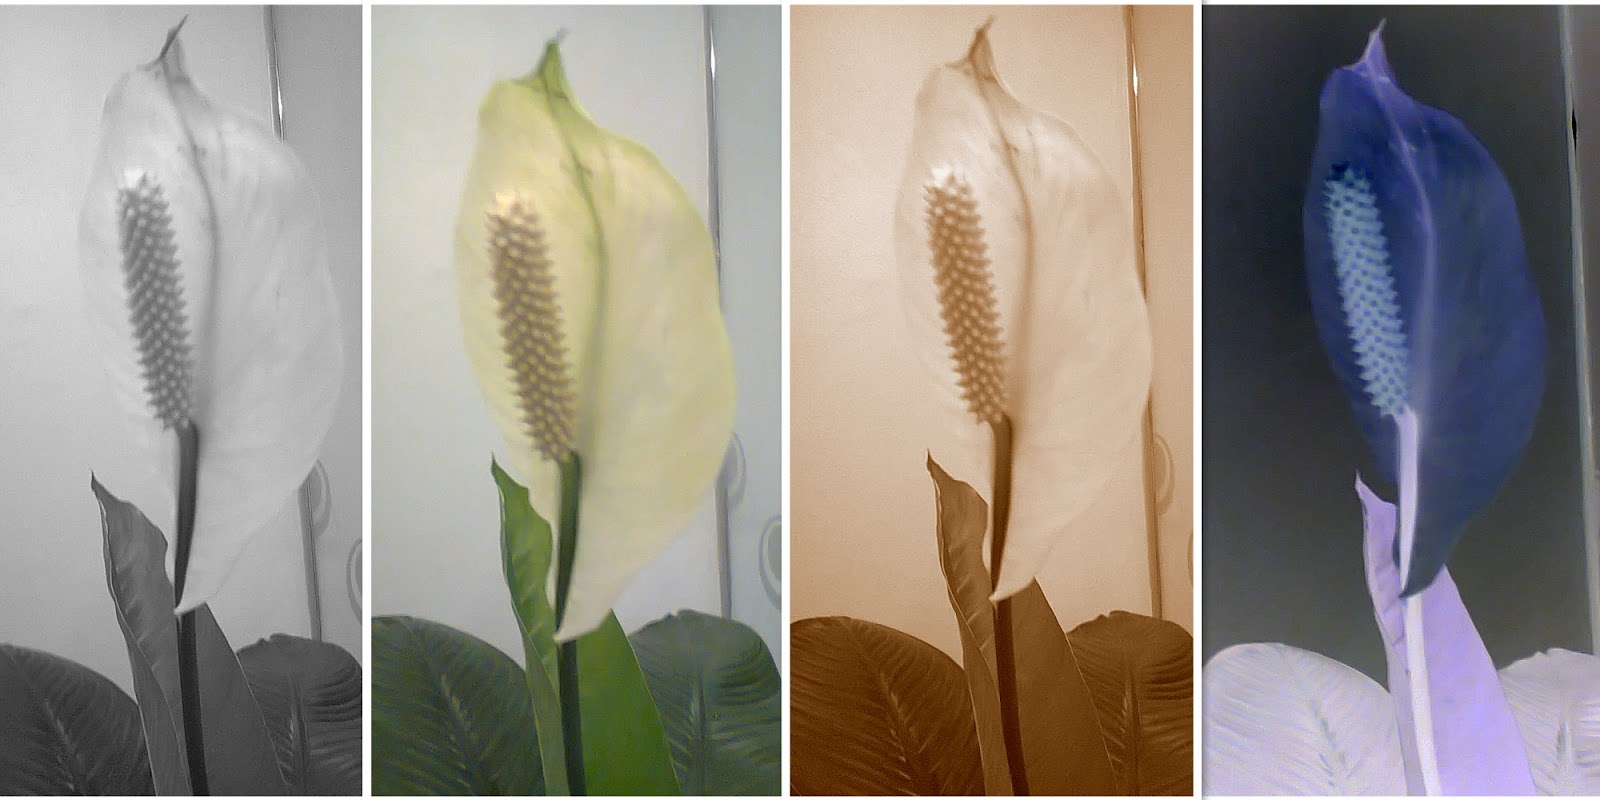
This beautiful flower in my office's hallway caught my attention and while waiting for a friend; decided to be the star of my next creative piece.

Left my digital camera at home so I opted to use for my humble but always ready Nokia C3 phone to capture this beauty. However, the lighting inside the area was so poor that I couldn't capture the rich color of the plant. Then I observed that I could play with the camera's effects: greyscale, normal, sepia and negative. When I get home, I collage the pictures, place it side by side and a simple art emerged from what was an experiment just little later.

Try it for yourself. Get one thing and take photos of it using your phone's different camera effects. Have it printed and then frame. Simple but a statement piece worthy to be place in your room.

** dReaM, CreAte, InsPire ***

*** Craftaholic Pinay ***